 Contact Us

Large-format tile has become the standard for modern shower design with fewer grout lines, a cleaner look, and a more expensive feel underfoot. But large-format tile also removes a lot of the margin for error that smaller tile used to provide. When your tiles are 12×24, 24×24, or larger, every decision about drain placement and slope has to be right the first time, or you end up with standing water, lippage, or a shower pan that never quite drains the way it should.
This guide walks through what changes when you move to large-format tile, and how to plan your shower drain and shower pan layout so the finished shower performs as well as it looks.
Why Large-Format Tile Changes the Rules
With traditional small mosaic or 4×4 tile, a shower floor could rely on dozens of grout lines to help break up the slope and mask minor unevenness. Water had many small channels to find its way to the drain, and slight inconsistencies in substrate slope were largely invisible.
Large-format tile removes that safety net. A single 24×24 tile spans a much larger area with only one grout line at its edge, which means:
- Any deviation in slope shows up as a visible puddle rather than being absorbed across multiple grout joints
- Tile lippage becomes far more noticeable, since larger tiles amplify even a 1/16-inch height difference between adjacent pieces
- The substrate underneath has to be dead-accurate, because there’s no grout network to compensate for minor errors
This is why the drain and slope plan needs to be decided before a single tile is set and not adjusted around it.
Linear Drains Solve the Large-Format Slope Problem
This is where a linear shower drain has a real functional advantage over a traditional center drain when large-format tile is involved.
Center drains require slope in four directions. With a center point drain, the shower floor has to pitch toward the middle from all four walls. On a large-format tile floor, this means every single tile in the field needs to be individually cut and pitched at a slightly different angle to maintain a consistent 1/4-inch-per-foot slope toward the center which is an extremely difficult (and expensive) install to get right with big tile.
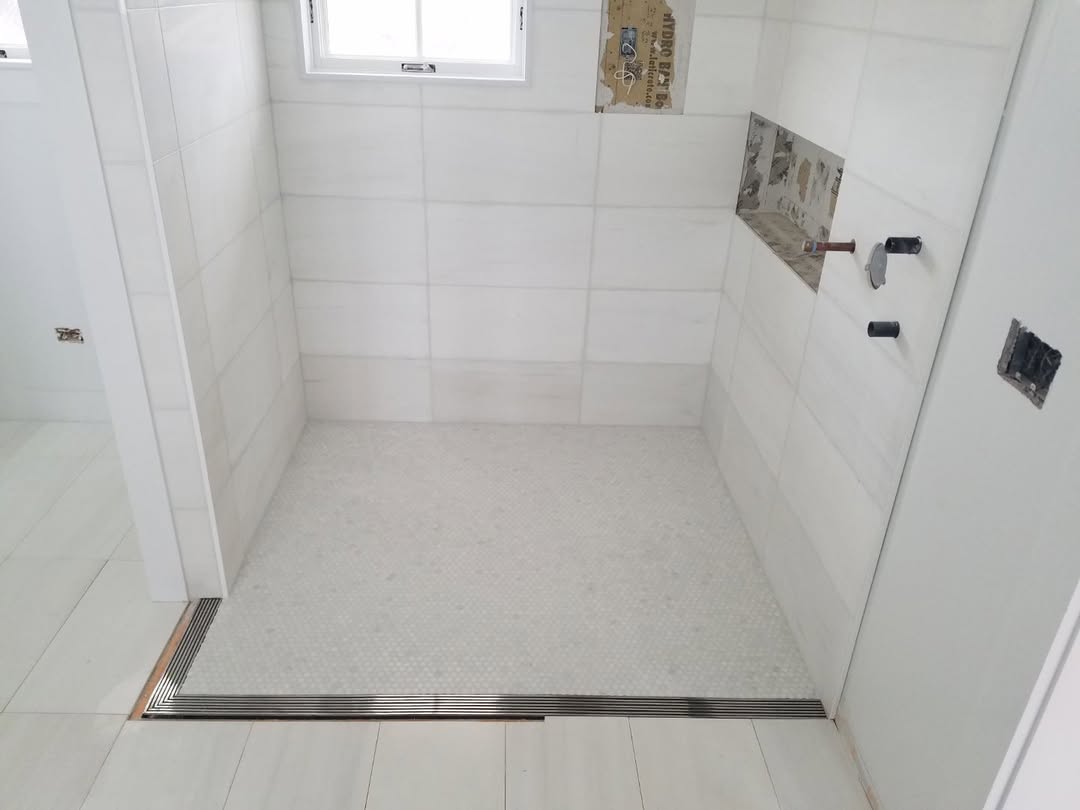
Linear drains require slope in only one direction. A linear drain positioned along one wall only needs the floor to pitch in a single plane, toward that one line. This is a dramatically simpler geometry for large-format tile: full-size tiles can run across the floor with a single, consistent pitch, and cuts are only needed at the drain edge rather than throughout the entire field.
For most large-format tile showers, a single-slope linear drain isn’t just a design preference, it’s the more buildable solution.
Where to Place the Drain
Drain placement should be one of the first decisions in a large-format tile shower, not an afterthought. A few placement principles matter most:
Match the drain length to the tile module. Where possible, size and position the linear drain so tile courses land on it cleanly, without requiring narrow slivers of tile at the drain edge. This keeps grout lines consistent and avoids awkward cuts that draw the eye.
Place it along the entry wall or back wall and not floating mid-floor. A drain set against a wall (rather than freestanding in the floor) simplifies the slope plan to a single pitch and usually looks more intentional in the finished space.
Account for niche and bench locations. If your shower includes a built-in niche or bench, factor those into the slope plan early. They can affect where water naturally wants to travel and may call for adjusting drain length or position.
Consider full 360-degree layouts for wet rooms. In curbless or wet-room designs where the shower has no defined footprint, drains that support a full radius layout offer more flexibility for slope planning across an open floor. Drains Unlimited offers custom configurations, including full 360-degree radius options, for exactly this kind of application.
Getting the Slope Right
Regardless of drain style, the fundamentals of proper shower floor slope don’t change:
Standard slope is 1/4 inch per foot. This is the industry benchmark for shower floors, and it’s steep enough to move water to the drain without being noticeable underfoot or creating an uncomfortable standing surface.
Slope starts at the substrate, not the tile. The mud bed or pre-formed pan beneath the tile is what establishes the pitch. Getting this layer right is the single most important step in the entire installation where tile simply follows whatever slope the substrate provides. Our guide to shower pan installation walks through this process in detail, including waterproofing sequencing that’s especially critical under large-format tile.
Pre-formed pans reduce risk on large-format installs. A one-piece stainless steel shower pan with the correct slope engineered and manufactured in, rather than built by hand on site, removes a major variable from large-format tile installations. Since there’s no margin for slope error with big tile, a factory-precise pan is often the safer choice over a hand-formed mud bed, particularly for DIY or first-time large-format installs.
Check slope with a level before setting tile, and again after. Large-format tile makes it much harder to correct a slope problem after the fact, so verifying the substrate pitch before tile goes down and spot-checking with a level as you work is worth the extra time.
Avoiding Lippage on Large-Format Shower Floors
Lippage (uneven tile edges) is one of the most common complaints with large-format shower floors, and it’s directly connected to slope and drain planning:
- Use a tile leveling system to hold adjacent tiles flush while thinset cures
- Back-butter large-format tiles fully to eliminate voids that cause tiles to settle unevenly
- Work from the drain outward in consistent rows, rather than starting from a wall and working toward the drain, so the pitch stays even across the full run
Choosing the Right Drain for Your Large-Format Tile Shower
Once slope and placement are planned, drain selection comes down to a few practical factors: shower size, whether the drain sits against a wall or in an open wet-room layout, and finish preferences that match your fixtures and hardware. Browse the full range of linear drain styles, lengths, and grate finishes in our shop, or explore shower drain and shower pan options directly to compare configurations for your project.
For a deeper comparison of drain styles before you commit, our guide on linear vs. traditional shower drains covers performance, cost, and installation differences in more detail, and our curbless shower guide is worth reading if you’re planning a barrier-free, wet-room-style layout alongside your large-format tile.
Work With Drains Unlimited on Your Next Renovation
Large-format tile delivers a striking, high-end look but only when the drainage plan underneath it is engineered correctly from the start. Drains Unlimited manufactures linear drains and shower pans in precision 304 and 316 stainless steel, with the sizing and configuration flexibility large-format tile installations demand.
Explore our residential drainage solutions to learn more, or reach out to our team to talk through drain placement and slope planning for your specific shower layout before your renovation begins.
You may also like...
 Why Cheap Drain Repairs Cost More Than Premium Replacements
Cheap drain repairs cost 3-5x more than premium replacements over time. Learn the hidden costs, failure cycles, and economics of doing drainage right the first time.

 Drain Maintenance 101: How to Keep Your Drains Flowing Smoothly
Learn how to keep your drains flowing smoothly with our ultimate guide. Discover prevention tips, DIY fixes, and when to call a professional.
 What Are the Advantages of Stainless Steel Floor Drains? The Complete Guide
Discover the benefits of stainless steel floor drains including corrosion resistance, hygienic properties, and extended lifespan.